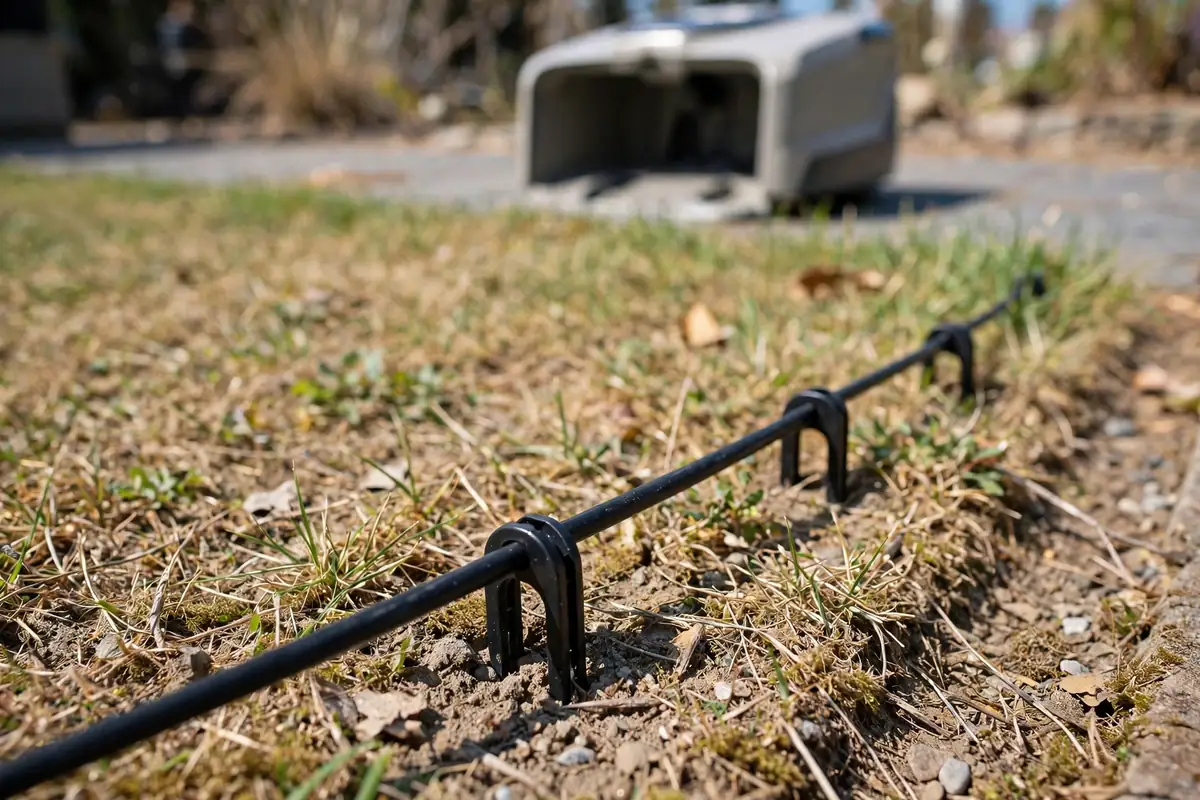
Learning how to install robot mower boundary wire correctly is mostly about planning before you peg anything down. In short: read your model’s manual, walk the lawn and sketch the route, measure how much wire you need, lay the wire in one continuous loop from the charging station, secure it close to the ground, connect both ends to the station, and test the signal before the first run.
What Boundary Wire Does
Boundary wire is a low-voltage cable laid around the mowing area and connected to the charging station. The station sends a signal through it, and the mower turns back when it detects it. The wire forms a single closed loop: if it is broken, crossed wrongly, or connected incorrectly, the mower may refuse to start, stop partway through, or wander outside the intended area. First check that your mower actually uses boundary wire, since some newer models use satellite positioning or cameras instead.
Before You Start: Read the Manual
Every wired model has its own requirements, so follow your manual. It states the boundary wire distance from lawn edges, paths, walls, flower beds, and ponds for your exact model, the minimum distance between two sections of wire, how to handle narrow passages, and whether the wire may be buried and how deep. Never use a universal spacing value: the correct distance depends on the mower’s size and sensors, and a distance that works for one model can leave an uncut strip, or let the mower overrun an edge, on another. Note the maximum wire length and connector type, then gather the supplied wire and pegs, spare connectors, a tape measure, and a mallet. Check the wire for nicks or kinks, and keep children and pets away while you work.
Step 1: How to Install Robot Mower Boundary Wire — Plan the Layout
Walk the whole mowing area slowly with the manual’s layout diagram, looking at edges, slopes, narrow gaps, and anything the mower could bump into. Decide what is inside the mowing area and what is outside it: flower beds, vegetable patches, ponds, pools, and gravel usually belong outside the loop, while trees and posts inside the lawn need either room to pass around or an island, explained below. Sketch the route, marking the charging station first, then trace the perimeter in one direction, noting each corner, island, and path crossing. Mow long grass first, clear sticks, stones, toys, and hoses, and trim back overhanging plants.
Step 2: Measure the Perimeter
Measure the route you sketched, not the lawn as a whole, using a measuring wheel or a string laid along it. Add a margin for corners, islands, and the run to and from the charging station, since islands need wire out and back, and the station needs slack. Cutting too little wire is a common cause of failure, because a short loop cannot be stretched to fit. Check the manual for the maximum total wire length; if your lawn needs more, do not simply add extra wire, as the signal may become too weak.
Step 3: Place the Charging Station
The charging station is the start and finish of the loop, so its position shapes the whole perimeter cable setup. Place it on flat, level ground at the edge of the lawn, with a clear approach from the front and space for the mower to enter and leave without turning sharply. It needs a power socket within reach of the supplied cable, routed out of the mowing area where nobody can trip over it. Both ends of the wire connect to the station, one to each terminal the manual identifies, so check the markings carefully: reversed ends are a common reason a new installation will not work. Leave a little slack at the station, since tight wire is more likely to snap as the ground moves.
Step 4: Lay the Wire, Corners, and Narrow Passages
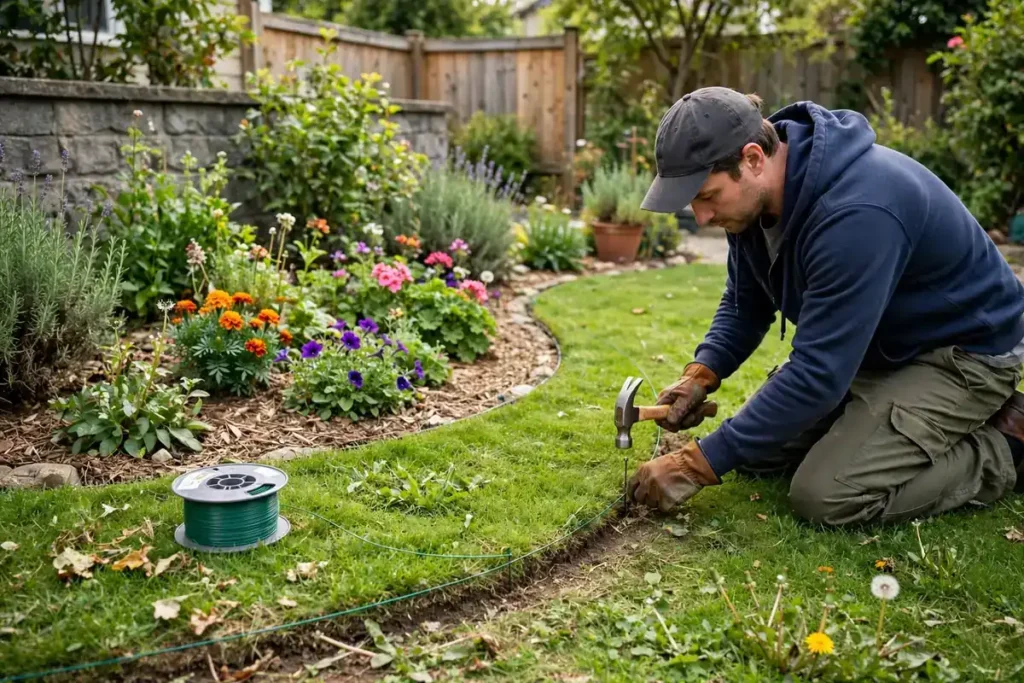
Lay the wire flat along your marked route, free of twists and kinks, working in one direction from the station, around the perimeter, and back to the station, so it forms a single continuous loop with no joins in the middle of a run if you can avoid it. Keep it at the boundary wire distance your manual specifies from edges, walls, paths, and obstacles. The mower’s body extends beyond its cutting disc, so the wire usually sits a short distance inside the lawn edge, but how far depends entirely on the model. Do not guess, and do not copy a figure from a different model.
Round corners rather than making them square: a gentle curve lets the mower follow the wire smoothly, while a tight V-shape can leave part of the lawn outside the loop. For a narrow passage between two lawn areas, the mower needs room to pass without its wheels crossing the wire on either side, and the two runs of wire must stay far enough apart that their signals do not interfere. Your manual states the minimum passage width and wire separation for your model; never invent a universal minimum. If a passage is too narrow, widen it, treat the far area as a separate zone if your model supports it, or mow that area another way.
Step 5: Create Islands Around Obstacles
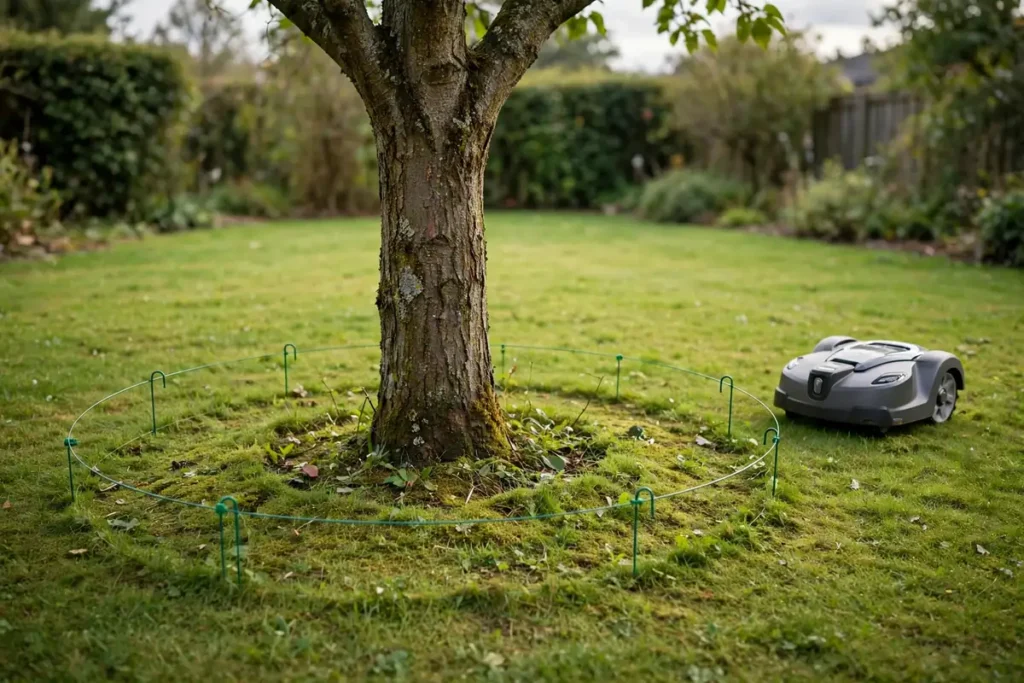
An island is a loop of boundary wire around an obstacle inside the mowing area, such as a tree, shrub, pond, or flower bed, so the mower goes around it instead of into it. It uses the same continuous wire as the perimeter, not a separate piece. Run the wire from the perimeter out to the obstacle, loop it around at the distance your manual specifies, and run it back along the same route. The outgoing and returning wires must lie close together, as the manual directs, so their signals cancel out and the mower does not treat the path to the island as a boundary. Never rely on an island alone to protect a pond or a drop unless the manual says the setup is suitable — a physical barrier is safer there.
Step 6: Secure the Wire or Bury It
Most installations start with the wire secured on the surface with pegs, which lets you test the loop and adjust it before burying it; the grass soon grows over it and hides it. Push pegs in at the spacing your manual recommends, using more on curves, slopes, and uneven ground. The wire should sit close to the ground along its whole length, with no raised loops a blade, foot, or garden tool could catch. Tap each peg in firmly, but not so hard that it cuts the wire. Some manuals allow the wire to be buried a short distance below the surface, but the signal weakens with depth, so never bury it deeper than the manual permits, and never bury it before testing the loop on the surface.
Step 7: Connectors and Testing the Loop
Use only the connector type your manual specifies. A poor join is the most common cause of boundary wire troubleshooting, often appearing weeks later when moisture creeps into a badly sealed connection. Strip only as much insulation as the connector requires, close or crimp it firmly, and seal it as directed. Do not join wire with tape alone, and do not twist bare ends together and bury them.
Testing is not optional. Switch the station on and check its indicator: a steady signal light, as described in the manual, usually means the loop is complete, while a flashing or red light usually means a break, a short circuit, or a connection problem. Then run the test the manual describes, such as a short test mow or a return-to-station run, and watch the mower at corners, islands, and passages. Do not leave it unattended on its first test. If it behaves unexpectedly, switch it off and check the wire and the manual.
Common Mistakes and Boundary Wire Troubleshooting
| Mistake | What goes wrong | How to avoid it |
|---|---|---|
| Guessing the boundary wire distance | Uncut strips, or the mower overrunning an edge | Use only the distances in your model’s manual |
| Laying wire before planning | Corners too tight, wire too short | Sketch the route and measure first |
| Sharp corners and kinks | Mower stops, reverses, or misses patches | Use smooth, rounded corners and kink-free wire |
| Wires too close in a passage | Signal interference; mower refuses to cross | Keep the manual’s minimum separation |
| Loose wire above the grass | Wire caught by blades, strimmers, or feet | Peg the wire flat to the ground |
| Poor or taped joins | Signal fails after rain or over time | Use the specified connectors, sealed as directed |
| Burying wire before testing | Faults hidden underground | Test on the surface first |
| Wrong terminals at the station | No signal, or unpredictable behaviour | Check the terminals and wiring diagram |
Even a careful installation can develop a fault later, when a spade, strimmer, or animal cuts the wire, or a connector corrodes. Check first that the station is powered, both wire ends are firmly on the correct terminals, and the connectors are dry and undamaged, then walk the loop looking for cuts or raised wire. If you cannot find the break, contact the manufacturer or a qualified installer, and re-test the loop after any repair.
After Installation and Conclusion
Once the loop tests correctly, let the lawn grow over the surface wire for a few weeks before using a strimmer, edger, or aerator near the boundary. Keep your sketch of the wire route somewhere safe, and check the wire after the first few mows, after heavy rain, and at the start of each season.
A reliable boundary wire installation comes from planning, measuring, and testing, not speed. Read the manual, sketch the route, measure carefully, lay smooth corners and tidy islands, secure the wire flat, make solid connections, and test the loop before the first mow.
Frequently Asked Questions
How do I know how far from the edge to lay boundary wire?
Check your model’s manual. The correct distance depends on the mower’s size, wheel position, and cutting disc, so it varies by model. Do not use a distance from a different model.
Can I bury robot mower boundary wire?
Only if your manual allows it, and only to the depth it specifies. Burying it too deep can weaken the signal, and burying it before testing makes faults much harder to find. Test the loop on the surface first.
How do I make an island around a tree or flower bed?
Run the wire from the perimeter out to the obstacle, loop it around at the manual’s distance, and run it back along the same route so the two wires lie close together, as the manual directs. This cancels the signal on the approach path, while the island keeps the mower away from the obstacle.
What should I do if the charging station shows a boundary wire error?
Switch the mower off, check the station has power, both wire ends are firmly on the correct terminals, and the connectors are dry and undamaged, then walk the loop looking for cuts or raised wire. If you cannot find the fault, contact the manufacturer or a qualified installer.
Can I extend boundary wire if my lawn is larger than expected?
You can join extra wire using the connector type your manual specifies, but first check the maximum total wire length for your model. Exceeding it can weaken the signal. If your lawn needs more than the limit allows, check whether your model supports separate zones, and follow the manufacturer’s guidance.